
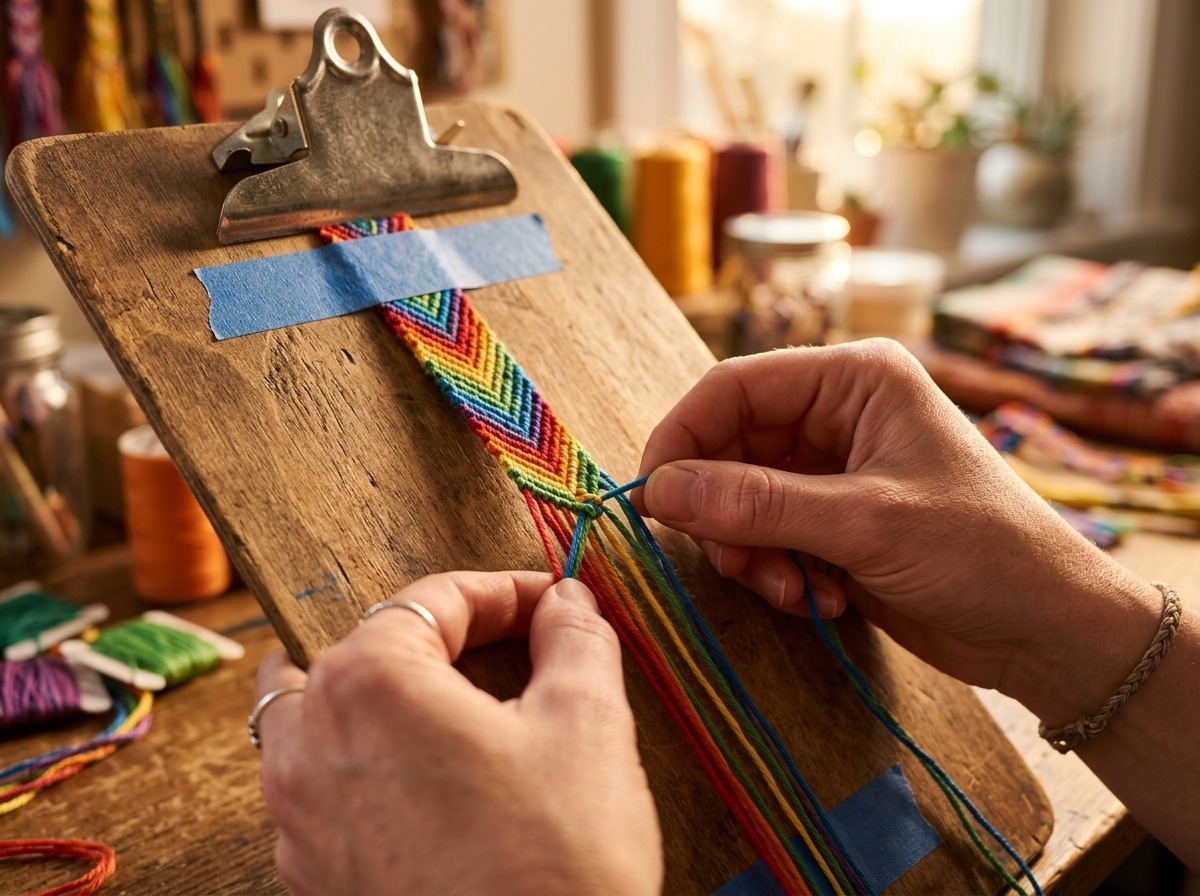
Friendship bracelets are more than colorful threads—they’re a fun way to express creativity and celebrate special connections. With a few simple techniques, you can create beautiful, personalized bracelets that make thoughtful gifts or stylish accessories. Discover the basics, explore creative patterns, and master the art of making friendship bracelets.
How to Design Patterns, Weave Hearts, and Finish with Adjustable Closures
| Key Takeaways
• Tension is Foundation: Inconsistent knot pressure causes 90% of curling and warping issues; maintaining equal pull across the two half-hitches of every knot ensures flat, clean edges. • Thread Mathematics Matter: Calculate cut lengths using the standard craft formula: Base Length = (Wrist Circumference × 5) + 20 cm for working strands to prevent mid-project shortages. • Heart Pattern Symmetry: The heart motif relies on transitioning an inverted chevron into an alternating double-diamond structure using forward-backward and backward-forward modifier knots. • Professional Finishes Outlast Ties: Replacing standard overhand tail knots with a macramé sliding square knot closure or double-fisherman’s knot elevates wearable durability and accommodates all wrist sizes. • Material Selection Dictates Longevity: While 6-strand Egyptian cotton provides the best color vibrancy for flat patterns, braided nylon cord or waxed polyester offers superior friction retention for adjustable rope closures. |
1. Material Mechanics and Workspace Setup
Creating durable, professional-grade woven jewelry requires understanding thread composition, tensile behavior, and tension control. While beginners often start with multipack craft floss, the structural integrity of your weave depends heavily on fiber selection.
Thread Anatomy and Material Grading
▪ Six-Strand Mercerized Cotton: The undisputed industry standard for flat, pixel-style chevron and alpha bracelets. Mercerization chemically treats the cotton fibers to increase tensile strength, reduce surface lint, and give the strands a lustrous finish that resists friction abrasion. For consistent dye lots and minimal splitting, stick with high-grade manufacturers such as DMC Colorfast Floss (dmc.com).
▪ Waxed Polyester Cord (Linhasita / Micro-Macramé): The gold standard for waterproof, heavy-wear adjustable rope bracelets. The wax coating locks knots firmly in place through microscopic surface friction, preventing slippage on sliding clasps.
▪ Braided Nylon & Chinese Knotting Cord (0.8mm): Ultra-smooth and durable. Best suited for core cords in adjustable closures and round-braid kumihimo styles, though slicker surfaces require tighter knot anchors.
The Thread Calculation Formula
Running out of working thread halfway through a complex piece is the most frustrating error in thread-craft. Because working strands (those making the knots) consume thread three to four times faster than base/passive strands, never cut all threads to the same arbitrary length.
Calculation Formula: Working Strand Length = (Target Pattern Length × 4.5) + Lead End Allowance (10 cm) + Tail End Allowance (15 cm)
For a standard 15 cm (6-inch) pattern section:
▪ Passive/Core Strands: 15 cm + 25 cm = 40 cm
▪ Active/Working Strands: (15 cm × 4.5) + 25 cm = 92.5 cm (round up to 95–100 cm)
Workspace Ergonomics and Tension Anchors
Your knotting surface must keep uniform tension across all passive strands while you pull working knots around them:
▪ 1. Heavy-Duty Clipboard with Foam Padding: Slide a high-density craft foam strip under the metal clip. The foam cushions the strands, preventing individual threads from sliding out when pulled at varying angles.
▪ 2. Safety Pin and Fabric Cushion: Fasten your starting loop to a heavy denim cushion or the knee of your jeans. This allows you to rotate the anchor dynamically to match the knotting angle.
▪ 3. Slotted Foam Loom (for Round Weaves): If you are transitioning between flat woven patterns and round adjustable rope designs, a slotted circular foam disc ensures balanced tension distribution across multi-strand layouts.
2. Core Knot Mechanics: The Four Foundational Stitches
Every friendship bracelet—from a simple diagonal stripe to an intricate multi-color tapestry—is constructed using combinations of just four knots. Every single knot is actually a double half-hitch composed of two individual wraps over a passive core strand.
▪ 1. Forward Knot (F / Normal Forward): The active thread on the left forms the shape of a numeral ‘4’ over the stationary thread on the right. Cross the left strand over the right strand, loop the tail behind the right strand, and pull the working end up through the loop. Cinch the first half-hitch firmly against the previous row. Repeat the exact same step to complete the double knot. The working strand shifts from left to right.
▪ 2. Backward Knot (B / Normal Backward): The active thread on the right forms the shape of a letter ‘P’ over the stationary thread on the left. Cross the right strand over the left strand, pass the tail under the left strand, and pull up through the opening. Cinch firmly, then execute a second identical half-hitch. The working strand shifts from right to left.
▪ 3. Forward-Backward Knot (FB / Direction Reversal): Tie the first half-hitch as a Forward Knot (forming a ‘4’). Tie the second half-hitch as a Backward Knot (forming a ‘P’) on the exact same passive strand. This creates a knot matching the color of the active strand, but returns that strand back to its original left-side position. Essential for borders, chevron tips, and heart lobes.
▪ 4. Backward-Forward Knot (BF / Direction Reversal): Tie the first half-hitch as a Backward Knot (‘P’), then tie the second half-hitch as a Forward Knot (‘4’) on the same passive strand. Displays the color of the active strand on the row while returning the thread to the right side.
3. How to Make Your Own Friendship Bracelet Pattern
Designing custom patterns requires translating pixel grids into knot structures. Patterns fall into two primary structural categories: Normal Patterns and Alpha Patterns.
Normal Patterns vs. Alpha Patterns Architecture
▪ Normal Patterns: Built on a 45-degree isometric diamond grid where alternating strand pairs are knotted per row (N strands yield N/2 knots per row). Every strand acts as both structural core and visible color, yielding high diagonal stretch and supple drape. Ideal for chevrons, hearts, and diamond weaves.
▪ Alpha Patterns: Constructed on a 90-degree orthogonal pixel grid. Base warp strands run vertically while a single working strand weaves horizontally across all base cords to form block-color pixel graphics, letters, and intricate logos.
Step-by-Step Custom Pattern Drafting
▪ 1. Establish Width by Knot Count: Determine the physical width needed. Using standard size 25 embroidery floss, 8 strands yield approximately 8–10 mm of width, while 16 strands produce 18–20 mm.
▪ 2. Plot the Isometric Grid: Use drafting software or triangular isometric graph paper. Draw diagonal axes at 45° angles intersecting to create node points.
▪ 3. Map Color Continuity: Track each strand’s path through the design. If a strand moves from the left edge toward the center, its color will dominate the diagonal line until redirected using an FB or BF knot.
▪ 4. Digitize and Verify: Use pattern modeling tools such as BraceletBook (braceletbook.com) or Friendship-Bracelets.net to verify strand balance. An unviable pattern occurs when a strand color is required at a coordinate it cannot physically reach.
4. Step-by-Step Tutorial: The Classic Heart Friendship Bracelet
The heart pattern is one of the most recognizable designs in fiber art, combining chevron arrowheads with alternating internal diamond fills to create heart lobes.
Pattern Specifications & Initial Strand Layout
Skill Level: Intermediate
Strands: 8 strands total (4 of Color A [Heart Background], 4 of Color B [Heart Outline/Body])
Cut Length: 100 cm (39 inches) per strand | Finished Width: ~1 cm
Initial Layout: Strand Order (Left to Right): [1:A] – [2:B] – [3:A] – [4:B] | [5:B] – [6:A] – [7:B] – [8:A]
Row-by-Row Execution Guide
▪ Row 1 (Chevron Framing): Strand 1 makes Forward Knot (F) onto Strand 2; Strand 3 makes (F) onto Strand 4; Strand 8 makes Backward Knot (B) onto Strand 7; Strand 6 makes (B) onto Strand 5.
▪ Row 2 (Center Connection): Leave outermost strands untouched. Strand 2 ties (F) onto Strand 3. Center strands 4 and 5 connect with a Forward Knot (F). Strand 7 ties (B) onto Strand 6.
▪ Row 3 (Lobe Expansion): Strand 1 ties (F) onto Strand 2; Strand 3 ties Forward-Backward (FB) onto Strand 4 to lock border. Strand 8 ties (B) onto Strand 7; Strand 6 ties Backward-Forward (BF) onto Strand 5.
▪ Row 4 (Creating Heart Cleavage): Skip outermost strands. Strand 2 ties (B) onto Strand 3. Center-right strand ties (F) onto center-left strand. Strand 7 ties (F) onto Strand 6.
▪ Rows 5–8 (Point Formation & Reset): Work standard chevron rows inward toward the center to seal the bottom point of the heart. Row 8 joins the center point using a final Forward Knot (F) with the two innermost heart-colored strands.
Repeat Rows 1 through 8 until the desired length is reached (typically 5 to 7 full heart repeats).
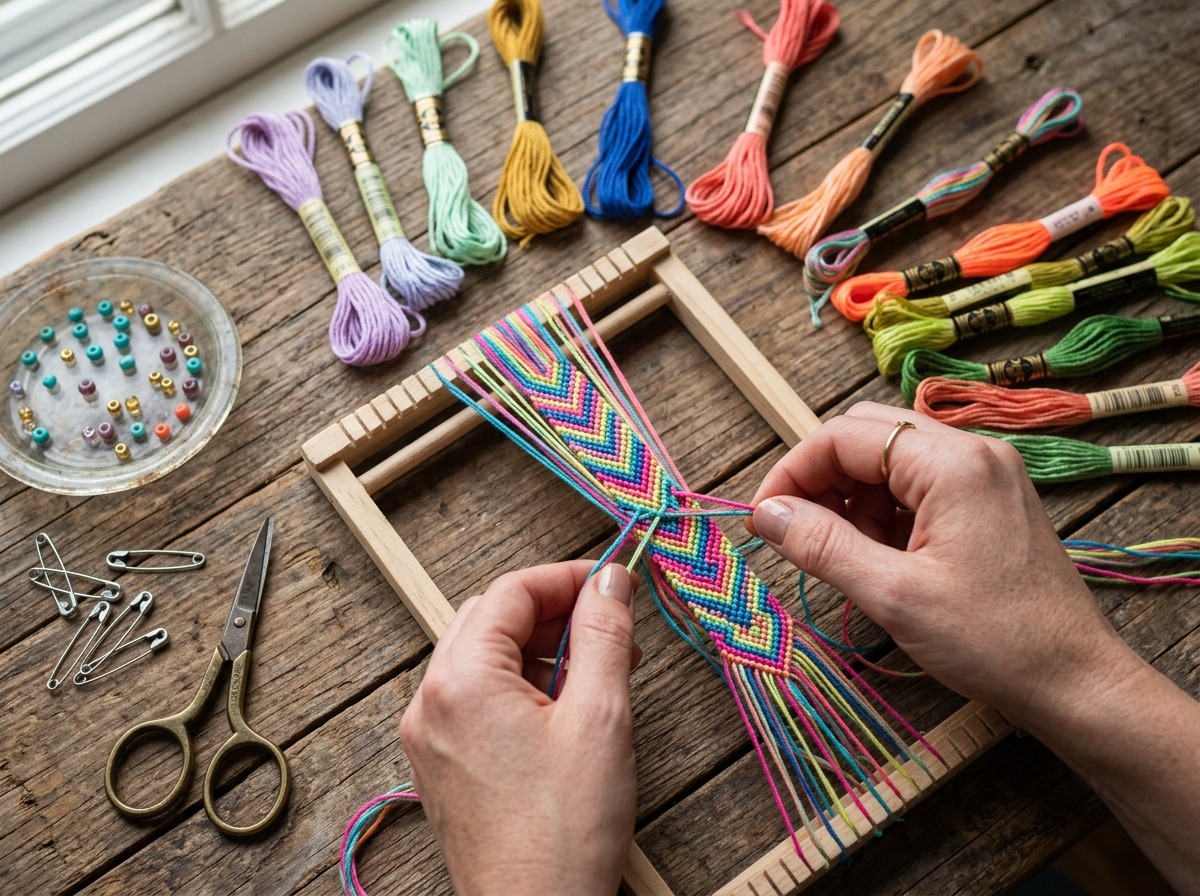
5. Professional Finishes: Engineering Adjustable Closures
Frayed knots that must be cut off destroy the longevity of handmade jewelry. Upgrading to a clean, structural closure lets you take the bracelet on and off easily while extending its life.
Technique A: The Macramé Sliding Square Knot Clasp
This method encases the loose end tails inside a separate sliding channel of knots. It works cleanly on both flat floss bracelets and round cords.
▪ 1. Prepare Tail Strands: Divide the loose threads on each end of the bracelet into two neat 3-strand braids (each 8–10 cm long). Tie small overhand knots at the very ends and trim excess fuzz.
▪ 2. Overlap the Tails: Overlap the left and right tail braids across each other in opposite directions, forming a circle matching your maximum hand-entry diameter.
▪ 3. Anchor Working Clasp Cord: Cut an extra 30 cm piece of matching or contrasting thread. Slide this cord horizontally under the crossed tail braids.
▪ 4. Execute Left Half of Square Knot: Pass the left working strand over the crossed tails to form a left loop. Pass the right strand over the left tail, under the crossed tails, and up through the left loop. Cinch snug around tails.
▪ 5. Execute Right Half of Square Knot: Pass the right working strand over the crossed tails, forming a right loop. Pass the left strand over the right tail, under the crossed tails, and up through the right loop. Cinch firmly to complete one square knot.
▪ 6. Repeat and Secure: Tie 4 to 6 continuous square knots. Trim working ends down to 2 mm. Secure the cut ends by melting lightly (if synthetic cord) or applying a tiny drop of Aleene’s ‘OK to Wash It’ Fabric Glue directly to knot ends. Never get glue on the center slider tails.
Technique B: The Double Sliding Barrel (Fisherman’s) Knot
Best suited for cord styles, leather cords, and minimalist braided rope pieces:
▪ 1. Overlap Cords: Overlap the two primary tail cords parallel to each other by roughly 12 cm.
▪ 2. First Barrel: Wrap Tail A backwards around both itself and Tail B three times, working back toward the loop.
▪ 3. Cinch: Thread the active end of Tail A through the three internal loops you just formed and pull tight to form a solid barrel knot.
▪ 4. Second Barrel: Flip the bracelet around and repeat the exact process using Tail B, wrapping it around Tail A.
▪ 5. Sliding Operation: Both barrel knots now slide independently along the opposite cord, allowing you to widen or constrict the bracelet smoothly.
6. Advanced Quality Control: Troubleshooting Common Flaws
▪ Informational Gap — Why Your Bracelet Curls: A knot’s half-hitches are asymmetric. If you pull upward and diagonally simultaneously, you introduce rotational torque into the warp strands. To fix: Hold the passive strand taut and pull the working strand straight up toward the top clipboard clip, parallel to the passive strand. Only after the first half-hitch is seated should you position the knot against the previous row.
▪ Seamless Mid-Project Thread Replacement: Do not tie a knot in the broken strand. Leave 3 cm of the exhausted strand hanging out through the back. Cut a new 60 cm replacement strand and lay it behind the bracelet alongside the exhausted strand. Use the new strand to tie the very next scheduled knot. Continue knotting for 3 to 4 rows, working over both tails on the back to trap them. Once secured, trim excess tails clean on the back and seal with a dot of fabric glue.
7. Comparative Material Guide
Select the best structural cord for your project goals using the technical breakdown below:
| Cord Type | Composition | Best Applied To | Water Resistance | Friction / Grip | Stretch |
| Mercerized Floss | 100% Long-Staple Cotton | Chevrons, Hearts, Alpha Lettering | Low (Swells when wet) | Medium | Very Low (<3%) |
| Waxed Polyester (Linhasita) | Bonded Synthetic Polyester | Adjustable Rope, Macramé, Micro-Knotting | High (Water/sweat proof) | High (Locks sliding knots) | Low (<5%) |
| Nylon Rattail / Satin | Continuous Filament Nylon | Kumihimo braids, heavy rope clasps | High | Low (Requires lock knots) | Medium (~8%) |
| Paracord (Type I / Micro) | Multi-Filament Nylon Sheath | Outdoor survival styles, chunky wraps | Very High | High | High (Up to 15%) |
8. Frequently Asked Questions (FAQs)
Q: Why is my friendship bracelet twisting into a spiral instead of laying flat?
Twisting occurs when the two half-hitches forming a single knot are tied with uneven tension, or when forward knots are tied on patterns intended for alternating directions (like a standard diagonal stripe versus a chevron). To keep your bracelet flat, keep the passive core strand completely straight and under tension while sliding the active knot up it. If the bracelet begins to spiral, gently roll it between your palms and iron it flat under a damp cloth using low steam.
Q: How can I make my friendship bracelets waterproof?
Bracelets made with traditional cotton embroidery floss absorb water, retain moisture against the skin, and gradually fade or stiffen from soap and chlorine exposure. To make fully waterproof bracelets, switch to waxed polyester cord (such as Linhasita) or nylon micro-cord. If using cotton thread, you can improve moisture resistance by coating the finished piece with a beeswax bar and melting it in lightly using a warm hairdryer.
Q: How do I stop the edges of my heart pattern from curling inward?
Heart patterns curl at Rows 3 and 5 because the FB and BF knots pull the outer edge threads in two opposite directions. To correct this, pull the first half-hitch of the edge knot slightly looser than your interior knots, then cinch the second half-hitch firmly straight up toward your clipboard anchor. This balances the directional pull on the border.
Q: What is the best way to clean a dirty woven friendship bracelet?
Soak the bracelet in a bowl of lukewarm water mixed with a few drops of gentle laundry detergent or wool wash for 15 minutes. Avoid harsh scrubbing, which can fray surface cotton fibers. Rinse thoroughly with cool water, pat dry between two clean towels, and lay flat to dry in the shade.
Q: Can I fix a mistake several rows down without undoing the entire bracelet?
Yes. You can unpick knots using a heavy tapestry needle or a sewing awl. Insert the point of the needle into the second half-hitch of the incorrect knot from underneath, gently pry it open, and pull the working thread through. Work backward through each knot in reverse sequence. Never use sharp scissors or razor blades to pick knots, as micro-cuts will compromise the core strands under tension.
Q: How long should the starting braid and ending ties be for an adult wrist?
A standard adult bracelet requires a 12 to 15 cm (5 to 6-inch) woven pattern section, accompanied by a 2 cm starting loop or braid and 8 to 10 cm (3 to 4-inch) ending ties on each side. This leaves plenty of length to comfortably slide the bracelet open over the widest part of the hand (typically 20–22 cm in circumference) when using an adjustable sliding clasp.
About Author


